If you’ve a movie and you want to add/merge/remove audio files or subtitles from that particular movie, then you’re at right place. Basically, adding or removing audio track from a video file is quite simple task. It can be done via a tool called MKVToolNix. So, this tool can be used for making dual or multiple audio movies. Also, you can add subtitle files to that movie additionally.
Also Read: Compress & Convert Videos Without Losing Quality
How to Create Dual Audio Movie Using MKVMerge GUI-
Before I start, first download the tool from here- Link1 or Link2. Now, Install the tool and run it from the shortcut created to desktop.
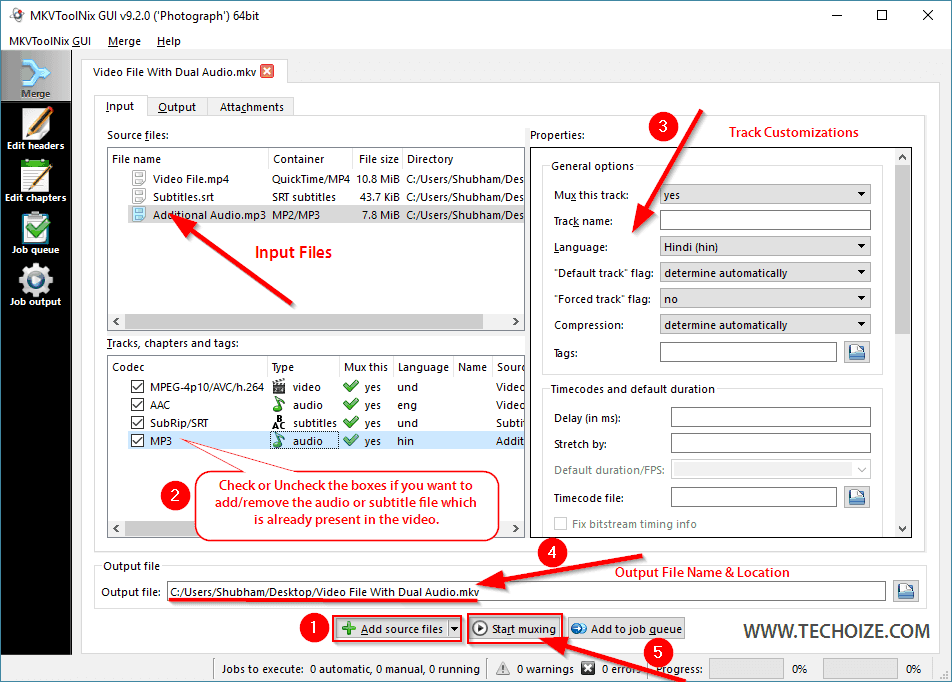
- Click on the ‘Add source files’ button to input source movie file. Again, add audio track or subtitle (from the same button) which you want to merge.
- Now, inside the ‘Tracks, chapters and tags’ section, click on the file (audio or subtitle).
- Customize the general options from the section ‘Properties’.
- Set the output file destination from ‘Output file’ section.
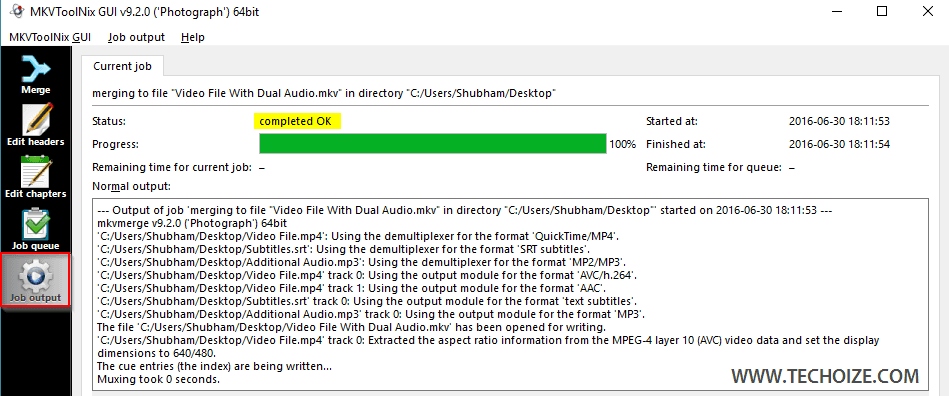
- Click on ‘Start muxing’ and wait for the process to finish.
- Done! You’ve successfully created dual audio movie in MKV format.
*Tip- For better audio synchronization with the video, add audio delay in +ve or -ve in milliseconds e.g. +100 ms, -150 ms etc. Note, that negative delay shouldn’t be used with video file.
Thanks for reading this. It’d be awesome to hear your thoughts in the comments.